Posts

Showing posts from January, 2023

Unlocking the Power of Templates in Microsoft Planner: A Step-by-Step Guide for Creating and Managing Organised Plans

Image
                                                    Planner Plan Templates Microsoft Planner is a powerful tool that allows users to create and manage plans and tasks in an organised and efficient manner. One of the most useful features of Planner is the ability to create plans using templates. This feature can save users a significant amount of time and effort when creating plans, as it eliminates the need to start from scratch.

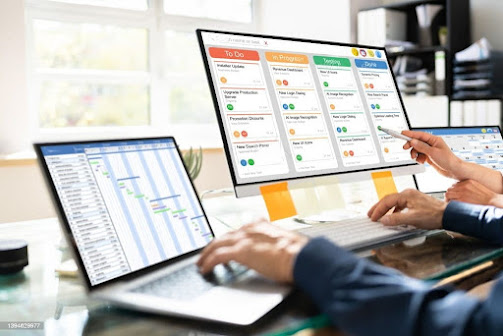
Microsoft Planner Integration with To Do

Microsoft Planner and Microsoft To Do are two powerful tools that can help you stay organized and on top of your tasks. Both tools are part of the Microsoft 365 suite, which means that they can be easily integrated with each other. Microsoft Planner is a visual task management tool that allows you to organize and prioritize tasks for yourself or your team. You can create task lists, set deadlines, assign tasks to team members, and track progress. Planner also has a built-in calendar view, which makes it easy to see upcoming deadlines and events. Microsoft To Do, on the other hand, is a simple task management tool that allows you to create and manage personal to-do lists. You can create multiple lists, set reminders, and mark tasks as complete. To Do also has a feature called "My Day," which allows you to focus on the tasks that are most important to you for the day. When you integrate Microsoft Planner and Microsoft To Do, you can take advantage of the best features of both t

Microsoft Planner Integration with other Office 365 Applications

Image
Microsoft Planner is a project management tool that is integrated with the Microsoft Office 365 ecosystem. It is designed to help teams collaborate and organize their work more effectively. One of the key features of Planner is its ability to integrate with other Office 365 applications, such as Outlook, Teams, and SharePoint. In this blog, we will explore how Planner can be integrated with these other applications to enhance collaboration and improve productivity.

Set-Up Guest Users in Microsoft Planner

Image
                                            Manage External Users in Microsoft Planner In Microsoft Planner, you can set up guest access to allow external users (such as partners, vendors, or clients) to view and collaborate on plans. Here are the steps to set up guest access: Go to the Microsoft 365 admin centre and select "Users" from the navigation menu. Select "Guest" from the left-hand menu and then click on "New guest user." Fill in the guest user's information, including their email address and name. Assign the guest user to a group that has access to the plans you want them to collaborate on. You can also assign them to a specific plan by clicking on "Add to a specific plan" Click on "Invite" to send an invitation to the guest user. Once the guest user accepts the invitation, they will be able to access and collaborate on the plans that they have been assigned to. It's important to keep in mind that guest users will only

Prevent users from deleting plans in Planner

Image
In Microsoft Planner, you can restrict users from deleting plans that were not created by them by using plan-level permissions. Here are the steps to do this: Open the Microsoft Planner app and navigate to the plan that you want to restrict. Click on the "More options" button (represented by three dots) and select "Plan settings" from the drop-down menu. In the "Plan settings" menu, click on the "Access" tab. Under "Who can edit tasks," you can choose to allow "Only the owner" or "Specific people" to edit tasks in the plan. This will prevent users who are not the owner of the plan or who are not specified in the "Specific people" list from deleting tasks. Under "Who can delete tasks" you can choose to allow "Only the owner" or "Specific people" to delete tasks in the plan. This will prevent users who are not the owner of the plan or who are not specified in the "Specific p

How to prevent users from creating Planner Plan

                                      Prevent users from creating Plans in Microsoft Planner There are several ways to restrict users from creating planner plans, depending on the specific system or platform you are using. Here are a few common methods: Role-based access control: This method involves assigning different roles to users and then setting permissions for each role. For example, you can create a "plan creator" role that has the ability to create planner plans, and then only assign this role to specific users who should be able to create plans. Other users will not have this role and will not be able to create plans. Group-based access control: This method involves creating groups of users and then setting permissions for each group. For example, you can create a group called "plan creators" and add users who should be able to create plans to this group. Other users who are not in this group will not be able to create plans. Plan-level permissions: This m

Working with External users in Microsoft Planner

Image
                                          External users in Microsoft Planner Microsoft Planner is a task management tool that allows teams to organize, assign, and track work. One of its key features is the ability to give guest users access to plans, allowing external collaborators to participate in the planning process. To give a guest user access to a plan, the plan owner or a team owner must first add the guest to the team that the plan belongs to. This can be done by going to the team's settings, selecting "members," and then adding the guest's email address. Once the guest has been added to the team, the plan owner or a team owner can then add them to the plan by going to the plan's settings, selecting "access," and then adding the guest's name. Once a guest has been added to a plan, they will be able to view and edit tasks, add comments, and participate in conversations. However, they will not be able to create new tasks or plans, delete task

Reporting in Microsoft Planner

                                                        Create Reports in Microsoft Planner Microsoft Planner is a powerful tool for project management and task organization. One of its key features is its reporting capability, which allows users to track progress, identify areas for improvement, and make data-driven decisions. One of the most useful pre-built reports in Microsoft Planner is the "Task progress" report. This report displays the number of tasks that have been completed, are in progress, or are yet to be started, giving users a clear overview of how their project is progressing. The report also includes a chart that shows the distribution of tasks by status, making it easy to identify which tasks are holding up progress. Another valuable report is the "Task assignments" report, which shows the number of tasks assigned to each team member and their progress. This report is particularly useful for managers who need to ensure that their team members are n

How to create recurring tasks in Microsoft Planner

Image
                                           Microsoft Planner Recurring Tasks Microsoft Planner is a task management tool that allows users to create and assign tasks, set deadlines, and track progress. One feature that Planner offers is the ability to create recurring tasks. Recurring tasks are tasks that repeat on a regular schedule, such as daily, weekly, or monthly. Here are the steps to create a recurring task in Microsoft Planner: Open Microsoft Planner and select the plan that you want to add the recurring task to. Click on the "New task" button to create a new task. In the "Due date" field, select the date on which you want the task to first occur. Click on the "Recurrence" button located just below the "Due date" field. Select the frequency of the task (daily, weekly, or monthly) and choose the specific day or days of the week on which you want the task to repeat. Set the number of occurrences of the task (for example, if you want the tas

Microsoft Planner: Block users from creating Office 365 Groups

In order to block users from creating Office 365 Groups in Microsoft Planner, you will need to use the Office 365 admin center. Log in to the Office 365 admin center with an account that has global administrator permissions. Navigate to the Groups section of the admin center. Select the "Settings" tab. Under the "Group Creation" section, select "Block creation of all groups." Click "Save" to apply the changes. Alternatively, you can also use the Exchange admin center to block the creation of Office 365 Groups.Log in to the Exchange admin center with an account that has global administrator permissions. Navigate to the Recipients > Groups section of the admin center. Select the "Settings" tab. Under the "Group Creation" section, select "Block creation of all groups." Click "Save" to apply the changes. You can also use PowerShell to block the creation of Office 365 Groups.Open the Exchange Online PowerShel

Microsoft Planner Overview

Image
                                                        Microsoft Planner Overview Microsoft Planner is a powerful tool that helps individuals and teams organize and manage their tasks and projects. With its intuitive and user-friendly interface, it's never been easier to stay on top of your to-do list and keep your team in sync. One of the most useful features of Microsoft Planner is its ability to create and assign tasks to team members. This allows everyone to see what needs to be done and who is responsible for completing it. Additionally, team members can easily update the status of their tasks and add comments, which helps keep everyone in the loop. Another great feature of Microsoft Planner is its visual task boards, which allow you to see the progress of your tasks and projects at a glance. This makes it easy to identify what needs to be done next and who is responsible for completing it. In addition to its task management capabilities, Microsoft Planner also includes a bui